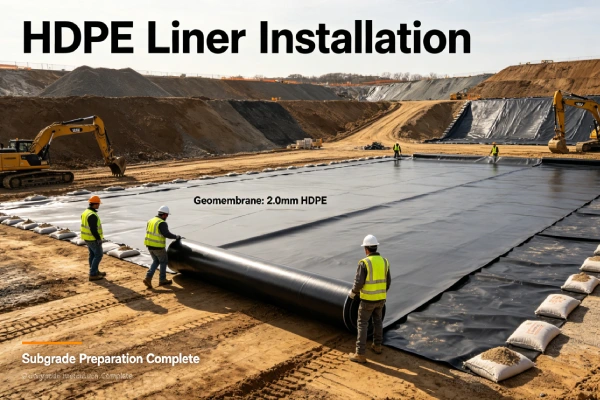
Preventing HDPE Liner Damage During Installation 2026 | Field Procedures & Protection
Application Guide 2026-07-26
Author: Senior Geomembrane Engineer, P.E. — 15+ years field experience in geomembrane installation supervision, damage prevention, and CQA across landfill, mining, and wastewater projects
Reviewer: Geosynthetics Materials Specialist
Last Updated: July 26, 2026
Read Time: 14 minutes
📅 Review Cycle: This guide is updated quarterly. Last verified: July 26, 2026
📋 Executive Summary — For Engineers in a Hurry
- Liner damage during installation is a leading cause of failure, accounting for 30–40% of all containment system failures through punctures, abrasion, and handling damage
- Subgrade preparation is the most critical factor — particles ≤ 6mm, compaction ≥ 95% Standard Proctor, and proof-rolling reduce puncture risk by 70–90%
- Equipment management is essential — tracked vehicles require protection (geotextile, plywood, or rubber mats) to prevent puncture and abrasion
- Foot traffic management — 20–30% of installation damage is caused by workers walking on the liner; designated walkways and shoe cleaning stations are required
- Geotextile protection layers (400–600 gsm) reduce puncture and abrasion risk by 60–80%
- CQA inspection during installation — 100% visual inspection, photographic documentation, and immediate repair of all damage are essential
⚠️ Critical Engineering Statement — Installation Damage is Preventable, Not Inevitable
Most installation damage is caused by inadequate planning, poor site management, or insufficient worker training. These are all preventable with proper procedures and oversight.
- 70–90% of puncture damage is caused by subgrade particles that could have been removed or controlled
- 20–30% of handling damage is caused by workers walking on unprotected liner
- Most damage is visible — 100% visual inspection can identify and repair damage before it causes failure
- Repairing damage during installation is 10–50x less expensive than remediation after failure
A well-planned and properly managed installation will have minimal liner damage. Prevention through planning, training, and CQA is the most cost-effective strategy for ensuring liner integrity.
📑 Table of Contents
1️⃣ Search Intent Introduction
2️⃣ Common Engineering Questions About Preventing Installation Damage
3️⃣ Why HDPE Is Used — Material Science Focus
4️⃣ Subgrade Preparation and Protection
5️⃣ Handling and Deployment Damage Prevention
6️⃣ Equipment Management on Liner Surfaces
7️⃣ Foot Traffic Management
8️⃣ Real Engineering Failure Cases
9️⃣ Comparison With Alternative Liner Systems
🔟 Damage Detection and Repair
1️⃣1️⃣ Professional Engineering Recommendation
1️⃣2️⃣ FAQ Section
1️⃣3️⃣ Technical Conclusion
1️⃣ Search Intent Introduction
This guide addresses the engineering question of how to prevent damage to HDPE geomembranes during installation and what procedures, protections, and quality controls are required. The primary audience includes installation supervisors, CQA engineers, EPC contractors, site managers, and facility owners responsible for installation quality and long-term liner performance.
Understanding damage mechanisms and prevention strategies is essential for achieving a high-quality installation, minimising repairs, and ensuring long-term barrier integrity. This is not an introductory overview — it is a data-driven engineering reference for professionals managing liner installation to prevent damage.
Real-world sources of installation damage include:
- ✅ Subgrade particles — angular aggregates, rocks, and debris causing puncture
- ✅ Equipment traffic — tracked vehicles, loaders, and trucks causing puncture and abrasion
- ✅ Foot traffic — workers walking on unprotected liner causing punctures and contamination
- ✅ Handling damage — tears, abrasion, and creases from deployment and movement
- ✅ Tool and equipment drops — sharp tools and equipment falling onto the liner
- ✅ Wind damage — wind uplift creating wrinkles, tears, and handling damage
2️⃣ Common Engineering Questions About Preventing Installation Damage
Q1: What is the most common cause of installation damage?
Subgrade particles are the most common cause of installation damage, accounting for 30–40% of punctures. Particles > 6mm create stress concentrations that puncture the liner under loading. GRI-GM13 requires particles ≤ 9.5mm; recommend ≤ 6mm.
Q2: How can equipment traffic be managed on liner surfaces?
Equipment management includes: using low-ground-pressure equipment, limiting speed to < 10 km/h, using geotextile protection (400–600 gsm) under traffic, using plywood or rubber mats for tracked vehicles, and designating equipment pathways.
Q3: How should workers be managed on liner surfaces?
Worker management includes: designated walkways (geotextile or plywood), shoe cleaning stations (remove stones and debris), limiting access to essential personnel only, and training on liner protection.
Q4: What geotextile protection is required during installation?
Geotextile protection (400–600 gsm) is recommended under equipment traffic and high-traffic areas. Geotextile should be placed directly on the liner or between the liner and traffic. GRI-GM13 provides guidance on geotextile protection.
Q5: How should subgrade be prepared to prevent damage?
Subgrade preparation includes: removing all particles > 6mm, compaction to ≥ 95% Standard Proctor, proof-rolling to identify soft spots, and filling voids. GRI-GM13 provides subgrade preparation requirements.
Q6: What are the signs of installation damage?
Signs include: visible tears, punctures, scratches, abrasion marks, creases, and contamination. Damage may be visible as small holes, cuts, or areas where the surface texture has been removed. HP-OIT testing can detect surface degradation.
Q7: How should installation damage be repaired?
Repair methods include: extrusion welding for small punctures and tears, patching for larger damage, and section replacement for extensive damage. All repairs must be documented and tested (air pressure or vacuum testing).
Q8: How can wind damage be prevented during installation?
Wind damage prevention includes: monitoring wind speed, suspending deployment when wind > 30 km/h, immediate ballasting of deployed panels, using sandbags or ballast pipes, and anchoring panels overnight.
Q9: What documentation is required for damage prevention?
Documentation includes: pre-installation subgrade inspection, damage log (location, type, size), repair records, photographs of all damage and repairs, and CQA sign-off on all repairs.
Q10: How can tool and equipment drops be prevented?
Tool and equipment drop prevention includes: using tool lanyards, designated tool storage areas, no loose tools on the liner, and using padded drop cloths under work areas.
3️⃣ Why HDPE Is Used — Material Science Focus
HDPE dominates liner applications due to its excellent chemical resistance, low permeability, high tensile strength, and weldability. However, its susceptibility to puncture, abrasion, and handling damage requires careful installation management.
Puncture Resistance (ASTM D4833): HDPE puncture resistance is typically 300–600 N for 1.5–2.5mm liners. Puncture resistance is reduced by stress concentration at particles. Subgrade preparation is critical to prevent puncture.
Abrasion Resistance: HDPE has good abrasion resistance but can be damaged by equipment traffic and foot traffic. Abrasion removes the surface layer, reducing thickness and potentially creating stress concentrators.
Tensile Strength and Handling: HDPE tensile strength is approximately 20–25 MPa. This allows handling without tearing but requires care to prevent damage. Stress concentrations from creases and folds can initiate failure.
Stress Crack Resistance (NCTL per ASTM D5397): Installation damage creates stress concentrators that can initiate ESC. Proper handling prevents stress concentrators from forming. Resins with NCTL ≥ 1000 hours provide greater margin against damage-related ESC. GRI-GM13 requires NCTL ≥ 500 hours.
Carbon Black Content: Carbon black (2–3%) provides UV protection but does not affect damage resistance. Proper dispersion (ASTM D5596 rating ≥ 1) ensures uniform properties.
Alternatives Comparison: HDPE vs Other Liner Materials for Damage Resistance
| Property | HDPE | LLDPE | PVC | EPDM | GCL |
|---|---|---|---|---|---|
| Puncture resistance | Good (300–600 N) | Moderate (200–400 N) | Poor (100–200 N) | Fair (100–300 N) | N/A |
| Abrasion resistance | Good | Moderate | Poor | Fair | N/A |
| Handling damage tolerance | Moderate | Moderate | Low | Low | N/A |
| Equipment traffic tolerance | Moderate | Moderate | Low | Low | N/A |
| Repairability | Excellent | Excellent | Moderate | Poor | N/A |
| Subgrade preparation required | Critical | Critical | Important | Important | N/A |
| Cost relative to HDPE | 1.0x | 1.0–1.1x | 1.2–1.5x | 2.0–3.0x | 0.6–0.8x |
4️⃣ Subgrade Preparation and Protection
Subgrade preparation is the most critical factor in preventing installation damage.
Subgrade Preparation Requirements:
| Parameter | Requirement | Purpose |
|---|---|---|
| Particle size | ≤ 6mm | Eliminate puncture points |
| Compaction | ≥ 95% Standard Proctor | Uniform support |
| Moisture content | Optimum ± 2% | Achievable compaction |
| Lift thickness | ≤ 200mm | Uniform compaction |
| Proof-rolling | Visual + testing | Identify soft spots |
| Void filling | All voids filled and compacted | Prevent bridging |
Table scrolls horizontally on mobile
Subgrade Inspection:
- ✅ 100% visual inspection: Before geotextile or liner placement
- ✅ Particle size verification: Sieve analysis at 100m intervals
- ✅ Compaction testing: At 100m intervals
- ✅ Soft spot identification: Proof-rolling with loaded equipment
- ✅ Documentation: Photographs of prepared subgrade
Protection Layers:
| Protection Type | Application | Effectiveness |
|---|---|---|
| Geotextile 400 gsm | Standard protection | 60–80% puncture reduction |
| Geotextile 600 gsm | Heavy equipment traffic | 80–90% puncture reduction |
| Sand cushion (50–100mm) | Subgrade protection | 70–80% puncture reduction |
| Plywood mats | Equipment pathways | 80–90% damage reduction |
Table scrolls horizontally on mobile
5️⃣ Handling and Deployment Damage Prevention
Proper handling and deployment prevent damage during installation.
Handling Procedures:
| Procedure | Purpose |
|---|---|
| Use spreader bars for lifting | Prevent stress concentrations |
| Avoid sharp edges and chains | Prevent abrasion and tearing |
| Use slings with padding | Prevent edge damage |
| Move slowly and carefully | Prevent creases and folds |
| Protect edges during movement | Prevent edge damage |
Table scrolls horizontally on mobile
Deployment Procedures:
| Procedure | Purpose |
|---|---|
| Deploy from centre outward | Minimise wrinkles |
| Provide 2–3% thermal slack | Prevent tension and wrinkles |
| Ballast immediately | Prevent wind uplift |
| Avoid folds and creases | Prevent stress concentrations |
| Align panels accurately | Minimise adjustments and handling |
Table scrolls horizontally on mobile
Tool and Equipment Management:
| Practice | Purpose |
|---|---|
| Tool lanyards | Prevent drops |
| Designated tool areas | Keep tools off liner |
| Padded drop cloths | Protect from dropped items |
| No loose tools on liner | Prevent punctures |
| Clean tools | Prevent contamination |
6️⃣ Equipment Management on Liner Surfaces
Equipment traffic is a significant source of installation damage.
Equipment Restrictions:
| Restriction | Requirement |
|---|---|
| Speed | < 10 km/h |
| Turning radius | Minimise sharp turns |
| Tracked vehicles | Use protection (plywood/rubber mats) |
| Tyre pressure | Low-ground-pressure tyres |
| Designated pathways | Geotextile protection |
| No equipment on unprotected liner | Protection required |
Table scrolls horizontally on mobile
Protection for Equipment Traffic:
| Protection Type | Application |
|---|---|
| Geotextile (400–600 gsm) | Under equipment traffic |
| Plywood mats | Tracked vehicles |
| Rubber mats | Heavy equipment |
| Designated pathways | All equipment movement |
| Sand cushions | Subgrade protection |
Table scrolls horizontally on mobile
Equipment Inspection:
- ✅ Clean tracks/tyres: Remove debris before entering liner
- ✅ Smooth surfaces: No sharp edges on equipment
- ✅ Low pressure: Minimum ground pressure
- ✅ Fluid leaks: Check for hydraulic or fuel leaks
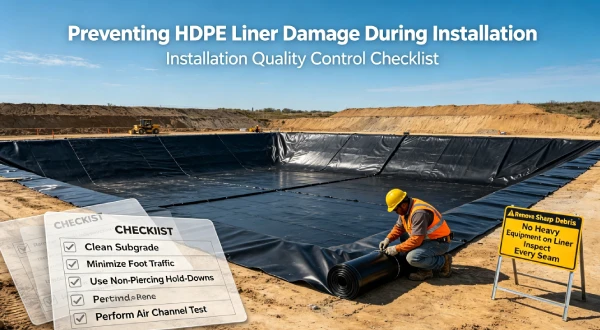
7️⃣ Foot Traffic Management
Foot traffic accounts for 20–30% of installation damage.
Worker Management:
| Practice | Purpose |
|---|---|
| Designated walkways | Protect liner from foot traffic |
| Shoe cleaning stations | Remove stones and debris |
| Limited access | Essential personnel only |
| Training | Liner protection awareness |
| Supervision | Monitor worker behaviour |
Table scrolls horizontally on mobile
Walkway Protection:
| Protection | Application |
|---|---|
| Geotextile strips (400 gsm) | High-traffic areas |
| Plywood walkways | Permanent access routes |
| Sand spread | Temporary protection |
| Marked pathways | Designate access routes |
Table scrolls horizontally on mobile
Worker Training:
- ✅ Liner damage awareness: What causes damage
- ✅ Walking on liner: Avoid dragging feet, sharp objects
- ✅ Tool handling: Keep tools off liner
- ✅ Damage reporting: Report all damage immediately
- ✅ Cleanliness: Keep work areas clean
8️⃣ Real Engineering Failure Cases
Case 1: Subgrade Particle Puncture — US Midwest Landfill, 2018
Specification used: 2.0mm HDPE, subgrade particles up to 40mm (exceeding specification). No geotextile protection.
Observed failure: Multiple punctures at particle locations after 2 years. Punctures 5–20mm diameter. Leakage through punctures.
Timeline:
2018: 2.0mm HDPE installed, subgrade particles > 40mm
2018-2020: Waste placement to 30m (450 kPa)
2020: Multiple punctures detected, leakage
2020-2021: Subgrade remediation and liner repair
Cost: $3.2M (subgrade remediation + liner repair + monitoring)
Root cause: Subgrade particles exceeded specification (40mm vs required ≤ 6mm). Loading of 450 kPa created stress concentration at particles. Puncture occurred at particle locations.
Engineering lesson: Enforce subgrade particle size ≤ 6mm. Use geotextile protection (400–600 gsm). 100% subgrade inspection before liner placement. Compaction testing at 100m intervals.
Case 2: Equipment Traffic Damage — Australian Heap Leach Pad, 2019
Specification used: 2.0mm HDPE, no geotextile protection. Tracked equipment used on liner without protection.
Observed failure: Abrasion and puncture from tracked equipment. Tears and abrasion marks across the liner. Leakage through damaged areas.
Timeline:
2019: 2.0mm HDPE installed, tracked equipment on liner
2019: Abrasion and puncture damage detected
2019-2020: Liner repairs, protection implemented
Cost: $1.8M (liner repairs + protection + monitoring)
Root cause: Tracked equipment used on liner without protection. Tracks caused abrasion and puncture. No geotextile protection was used.
Engineering lesson: Use geotextile protection (400–600 gsm) for equipment traffic. Use plywood mats for tracked vehicles. Designated equipment pathways. Speed limit < 10 km/h.
Case 3: Foot Traffic Damage — South African Wastewater Lagoon, 2020
Specification used: 2.0mm HDPE, no walkway protection. Multiple workers walking on unprotected liner.
Observed failure: Puncture and abrasion from foot traffic. Multiple small punctures and abrasion marks. Leakage through punctures.
Timeline:
2020: 2.0mm HDPE installed, workers on liner
2020: Puncture and abrasion damage detected
2020-2021: Liner repairs, walkway protection implemented
Cost: $1.2M (liner repairs + walkway protection + monitoring)
Root cause: Workers walking on unprotected liner. Stones in shoes caused punctures. No walkway protection was used.
Engineering lesson: Designated walkways with geotextile or plywood. Shoe cleaning stations. Limited access to essential personnel only. Worker training on liner protection.
Failure Case Cost Summary
| Case | Location | Failure Mode | Cost | Primary Lesson |
|---|---|---|---|---|
| Case 1 | US Midwest | Subgrade particle puncture | $3.2M | Subgrade ≤ 6mm, geotextile protection |
| Case 2 | Australia | Equipment traffic damage | $1.8M | Geotextile under equipment, plywood mats |
| Case 3 | South Africa | Foot traffic damage | $1.2M | Walkways, shoe cleaning, limited access |
9️⃣ Comparison With Alternative Liner Systems
| Property | HDPE (2.0mm) | LLDPE (1.5mm) | PVC (1.5mm) | EPDM (1.5mm) | GCL |
|---|---|---|---|---|---|
| Puncture resistance | 400–600 N | 200–400 N | 100–200 N | 100–300 N | N/A |
| Abrasion resistance | Good | Moderate | Poor | Fair | N/A |
| Subgrade preparation required | Critical | Critical | Important | Important | N/A |
| Equipment traffic tolerance | Moderate | Moderate | Low | Low | N/A |
| Foot traffic tolerance | Moderate | Moderate | Low | Low | N/A |
| Repairability | Excellent | Excellent | Moderate | Poor | N/A |
| Geotextile protection required | Recommended | Recommended | Required | Recommended | N/A |
| Cost relative to HDPE | 1.0x | 1.0–1.1x | 1.2–1.5x | 2.0–3.0x | 0.6–0.8x |
Table scrolls horizontally on mobile
🔟 Damage Detection and Repair
Early detection and repair of installation damage is essential for long-term performance.
Damage Detection:
| Method | Application | Detection Limit |
|---|---|---|
| Visual inspection | All surfaces | > 1mm defects |
| Touch inspection | Suspect areas | > 0.5mm defects |
| Light test | Through-liner defects | > 1mm holes |
| Leak location survey | After installation | > 1mm holes |
Table scrolls horizontally on mobile
Damage Types and Repair Methods:
| Damage Type | Repair Method | Effectiveness |
|---|---|---|
| Small puncture (< 5mm) | Extrusion patch | High |
| Large puncture (> 5mm) | Patch (round, radius ≥ 1m) | High |
| Tear ( < 50mm) | Extrusion weld or patch | High |
| Tear (> 50mm) | Section replacement | Very High |
| Abrasion (surface) | Extrusion overlay | Moderate |
| Crease/fold | Flatten and inspect | Variable |
Table scrolls horizontally on mobile
Repair Procedure:
- Identify the damage location and type
- Clean the area around the damage
- Prepare the repair material (extrusion welding or patch)
- Apply the repair
- Test the repair (air pressure or vacuum testing)
- Document the repair (photographs, location, sign-off)
Acceptance Criteria for Repairs:
| Test | Acceptance Criteria |
|---|---|
| Visual inspection | No visible defects |
| Air pressure test | No leaks, pressure hold |
| Destructive testing | Peel strength ≥ 150 N/25mm |
1️⃣1️⃣ Professional Engineering Recommendation
Installation Damage Prevention Checklist:
| Phase | Item | Verification |
|---|---|---|
| Pre-installation | Subgrade inspection | 100% visual |
| Pre-installation | Particle size | ≤ 6mm |
| Pre-installation | Compaction | ≥ 95% Standard Proctor |
| Pre-installation | Geotextile protection | 400–600 gsm |
| Installation | Handling procedures | Spreader bars, slings |
| Installation | Deployment | 2–3% slack, ballasting |
| Installation | Equipment traffic | Geotextile, plywood mats |
| Installation | Foot traffic | Walkways, shoe cleaning |
| Post-installation | Damage inspection | 100% visual |
| Post-installation | Repairs | Documentation and testing |
Table scrolls horizontally on mobile
Critical Prevention Measures:
- ✅ Subgrade: ≤ 6mm particles, ≥ 95% compaction, proof-rolling
- ✅ Geotextile: 400–600 gsm protection
- ✅ Handling: Spreader bars, slings, avoid sharp edges
- ✅ Deployment: 2–3% slack, immediate ballasting
- ✅ Equipment: Geotextile protection, plywood mats, speed < 10 km/h
- ✅ Foot traffic: Walkways, shoe cleaning, limited access
- ✅ Inspection: 100% visual, photographic documentation
- ✅ Repairs: Immediate, documented, tested
1️⃣2️⃣ FAQ Section
Q1: What is the most common cause of installation damage?
Subgrade particles are the most common cause of installation damage, accounting for 30–40% of punctures. Particles > 6mm create stress concentrations that puncture the liner under loading.
Q2: How can equipment traffic be managed on liner surfaces?
Equipment management includes: using low-ground-pressure equipment, limiting speed to < 10 km/h, using geotextile protection (400–600 gsm) under traffic, using plywood or rubber mats for tracked vehicles, and designating equipment pathways.
Q3: How should workers be managed on liner surfaces?
Worker management includes: designated walkways (geotextile or plywood), shoe cleaning stations (remove stones and debris), limiting access to essential personnel only, and training on liner protection.
Q4: What geotextile protection is required during installation?
Geotextile protection (400–600 gsm) is recommended under equipment traffic and high-traffic areas. Geotextile should be placed directly on the liner or between the liner and traffic.
Q5: How should subgrade be prepared to prevent damage?
Subgrade preparation includes: removing all particles > 6mm, compaction to ≥ 95% Standard Proctor, proof-rolling to identify soft spots, and filling voids.
Q6: What are the signs of installation damage?
Signs include: visible tears, punctures, scratches, abrasion marks, creases, and contamination. Damage may be visible as small holes, cuts, or areas where the surface texture has been removed.
Q7: How should installation damage be repaired?
Repair methods include: extrusion welding for small punctures and tears, patching for larger damage, and section replacement for extensive damage. All repairs must be documented and tested.
Q8: How can wind damage be prevented during installation?
Wind damage prevention includes: monitoring wind speed, suspending deployment when wind > 30 km/h, immediate ballasting of deployed panels, using sandbags or ballast pipes, and anchoring panels overnight.
Q9: What documentation is required for damage prevention?
Documentation includes: pre-installation subgrade inspection, damage log (location, type, size), repair records, photographs of all damage and repairs, and CQA sign-off on all repairs.
Q10: How can tool and equipment drops be prevented?
Tool and equipment drop prevention includes: using tool lanyards, designated tool storage areas, no loose tools on the liner, and using padded drop cloths under work areas.
1️⃣3️⃣ Technical Conclusion
Preventing liner damage during installation is essential for long-term containment integrity. Installation damage accounts for 30–40% of all containment system failures, making it the largest single cause of failure. Most installation damage is preventable with proper procedures, training, and CQA.
Subgrade preparation is the most critical factor in preventing installation damage. Particles ≤ 6mm, compaction ≥ 95% Standard Proctor, and proof-rolling reduce puncture risk by 70–90%. Geotextile protection (400–600 gsm) reduces puncture and abrasion risk by 60–80%. 100% visual inspection of prepared subgrade is essential.
Equipment and foot traffic management are essential for preventing damage during installation. Equipment traffic requires geotextile protection, plywood or rubber mats for tracked vehicles, and speed limits < 10 km/h. Foot traffic requires designated walkways, shoe cleaning stations, and limited access to essential personnel only. Worker training on liner protection is critical.
Damage detection and repair are essential for maintaining liner integrity. 100% visual inspection during and after installation identifies damage that must be repaired immediately. Repair methods include extrusion welding, patching, and section replacement. All repairs must be documented, tested, and signed off by CQA.
Lifecycle cost analysis demonstrates that damage prevention is cost-effective. The cost of subgrade preparation, geotextile protection, worker training, and CQA ($10,000–50,000 per project) is far lower than failure remediation ($1–5M). Damage prevention through proper planning, procedures, and CQA is the most cost-effective strategy for ensuring long-term liner integrity.
📚 Related Technical Guides
Installation Damage Prevention: A CQA Engineer's Field ManualSubgrade Preparation for Geomembrane Installation: Compaction, Particle Size, and CQAEquipment and Foot Traffic Management on Liner Surfaces: Protection ProceduresDamage Detection and Repair: Extrusion Welding, Patching, and TestingHDPE Geomembrane Failure Investigation: Installation Damage Root Cause Analysis