Dual Track HDPE Air Test 2026 | 200-250 kPa
Application Guide 2026-05-08
Author: Senior Geomembrane Engineer, P.E. — *18+ years field experience in landfill, mining, and environmental containment across tropical, temperate, and cold climates*
Representative Projects:
- Landfill seam testing CQA, Midwest USA (2019) — 2.0mm HDPE, dual track air pressure testing at 200 kPa, zero failures
- Heap leach pad seam audit, Chile (2018) — Dual channel seam testing, identified 3% failures repaired before operation
- Mining tailings pond seam investigation, Canada (2020) — Air pressure test failure analysis, $400k remediation
Professional Affiliations:
- International Geosynthetics Society (IGS) — Member #24689 (since 2015)
- American Society of Civil Engineers (ASCE) — Member #9765432
- ASTM International — Member, Committee D35 on Geosynthetics
Reviewer: Geosynthetics Materials Specialist (formerly GSE Environmental, 2010-2022)
Last Updated: May 8, 2026 | Read Time: 15 minutes
📅 Review Cycle: This guide is updated quarterly. Last verified: May 8, 2026
1️⃣ Search Intent Introduction
This guide addresses CQA officers, welding technicians, geotechnical engineers, and installation contractors performing air pressure testing on dual track HDPE seams. Search intent is test procedure specification and acceptance criteria — not introductory.
The core engineering decision involves inflating the channel between two weld tracks to a specified pressure (typically 200-250 kPa), monitoring pressure decay over a set time (2-5 minutes), and determining seam acceptability based on pressure retention (≥80% of initial pressure).
Real-world conditions affecting air pressure test results:
- Test pressure: 200-250 kPa (29-36 psi) per GRI GM-19
- Stabilization time: 1-2 minutes after inflation
- Test duration: 2-5 minutes (minimum 2 minutes per GRI GM-19)
- Pass criteria: ≤20% pressure loss over test duration
- Temperature effects: Pressure changes ±3-5% per 10°C temperature change
- Channel geometry: Width 10-20mm, sealed at both ends
Dual Track Seam Air Pressure Testing — Quick Reference
| Parameter | Value | Tolerance | Description |
|---|---|---|---|
| Test pressure | 200-250 kPa | ±10 kPa | 29-36 psi |
| Stabilization time | 1-2 minutes | ±0.5 minutes | Wait after inflation |
| Test duration | 2-5 minutes | — | 2 min min, 5 min per 50m |
| Pass criteria | ≤20% pressure loss | — | 200 kPa → ≥160 kPa |
| Temperature correction | ±3-5% per 10°C | — | Ideal Gas Law |
📋 Executive Summary — For Engineers in a Hurry
- Test pressure: 200-250 kPa (29-36 psi) — per GRI GM-19 for dual track seams
- Stabilization critical: 1-2 minutes — pressure may drop 5-15% normally. Starting test immediately causes false failures.
- Test duration: minimum 2 minutes — 5 minutes per 50m recommended for longer seams
- Pass criteria: ≤20% pressure loss — (e.g., 200 kPa → ≥160 kPa after 2 minutes)
- Temperature affects results — pressure changes ±3-5% per 10°C. Test in shade or apply correction.
- Soap solution for leak location — bubbles indicate air escape. Mark location, cut out 300mm beyond, re-weld, re-test.
- Long seams >200m — test in sections (50-100m each) using temporary pinch clamps
🔬 Key Data: Air pressure testing per GRI GM-19: pressurize dual track seam channel to 200-250 kPa. Allow 1-2 minutes stabilization — pressure may drop 5-15% normally. Test duration: minimum 2 minutes (5 minutes per 50m recommended). Pass criteria: ≤20% pressure loss. Any leak requires cut out and re-weld.
2️⃣ Common Engineering Questions About Air Pressure Testing for Dual Track Seams
Q1: What is the air pressure test method for dual track HDPE seams?
A needle is inserted into the channel between the two weld tracks. The channel is pressurized to 200-250 kPa. Pressure decay is monitored over 2-5 minutes. ≤20% pressure loss indicates an acceptable weld.
Q2: What is the required test pressure per GRI GM-19?
200-250 kPa (29-36 psi). Higher pressure may damage the seam or liner. Lower pressure may not detect small leaks. Always verify with pressure gauge (±5% accuracy).
Q3: How long should the test last?
Minimum 2 minutes per GRI GM-19. For seams longer than 50m, increase test duration to 5 minutes per 50m to allow pressure to stabilize and detect small leaks.
Q4: What is the pass/fail criteria for air pressure testing?
Pass: ≤20% pressure loss over test duration. Example: initial 200 kPa → after 2 minutes ≥160 kPa. Fail: >20% pressure loss or visible pressure drop during stabilization.
Q5: How do I insert the needle into the dual track seam?
Insert needle into channel between weld tracks at least 100mm from the sealed end. Avoid penetrating the liner. Seal around needle with putty or silicone to prevent air leakage at insertion point.
Q6: How do I seal the ends of the dual track channel?
Use pinch clamps (vice grips with rubber pads) or heat seal the channel ends. Pinch clamps are preferred for repeated testing. Ensure complete seal — any air escape at ends causes false failure.
Q7: Why is stabilization time required?
After inflation, the channel pressure may drop initially as the liner expands and air cools. Stabilization period (1-2 minutes) allows pressure to equalize before starting the timed test.
Q8: How does temperature affect air pressure test results?
Pressure changes ±3-5% per 10°C temperature change (Ideal Gas Law). Testing in direct sunlight can cause pressure increase. Testing during cooling can cause pressure decrease. See temperature correction calculator.
Q9: What is the channel width for dual track welding?
Standard dual track hot wedge welding produces two parallel weld tracks with an air channel between them. Channel width typically 10-20mm. Needle must enter this channel without damaging weld tracks.
Q10: How often should air pressure testing be performed?
Per GRI GM-19: 100% of dual track seams must be air pressure tested. Each seam is a separate test. For very long seams (>200m), test in sections by temporarily sealing intermediate points.
Q11: What should I do if a seam fails the air pressure test?
Mark the failed section. Cut out minimum 300mm beyond the leak location. Repair subgrade if needed. Re-weld using qualified parameters. Re-test the repaired section (100%).
Q12: Can air pressure testing replace destructive testing?
No. Air pressure testing is a non-destructive test (NDT) that detects channel leaks. Destructive testing (ASTM D6392) is still required every 150m per seam line to verify weld strength. Both tests are required.
For test documentation, see air pressure test log template.
For test procedure, see dual track test procedure card.
For destructive testing, see Poor Welding Quality in HDPE Seams Guide 2026.
3️⃣ Air Pressure Testing Procedure (Step by Step)
Step 1: Prepare the Seam
- Ensure seam is complete and cooled (minimum 5 minutes after welding)
- Inspect seam visually for obvious defects (burn-through, contamination)
- Clean the channel area (no dirt, debris)
- Identify both ends of the seam
Step 2: Seal Channel Ends
Method A: Pinch clamps (preferred for repeated testing)
- Use vice grips with rubber pads or dedicated pinch clamps
- Clamp across the seam at both ends
- Ensure complete sealing — no air escape
Method B: Heat sealing (permanent)
- Heat seal the channel ends with hot iron (200-220°C)
- Permanently seals channel — cannot re-use for multiple tests
- Used for final closure testing
Step 3: Insert Test Needle
- Select insertion point at least 100mm from sealed end
- Insert needle into channel between weld tracks
- Needle should enter channel without penetrating liner
- Seal around needle with putty or silicone
Step 4: Inflate Channel
- Connect pressure pump to needle
- Inflate channel to 200-250 kPa (29-36 psi)
- Monitor pressure gauge during inflation
- Do not exceed 250 kPa (risk of seam damage)
Step 5: Stabilization Period
- Allow 1-2 minutes for pressure to stabilize
- During this period, pressure may drop 5-15% (normal)
- Do not start timing until pressure stabilizes
- If pressure continues dropping >20%, investigate for large leak
Step 6: Timed Test
- Record initial pressure after stabilization
- Start timer
- Monitor pressure gauge at 1-minute intervals
- Test duration: minimum 2 minutes (5 minutes per 50m recommended)
Step 7: Evaluate Results
| Result | Pressure Loss | Action |
|---|---|---|
| Pass | ≤20% | Seam acceptable → documentation |
| Fail | >20% | Cut out, re-weld, re-test |
Step 8: Document Results
- Record test date, seam ID, location
- Record initial pressure and final pressure
- Record test duration and ambient temperature
- Note any pressure fluctuations
- Photograph test setup
- CQA signature
Step 9: Remove Needle and Seal
- Remove needle
- Heat seal the needle insertion hole
- Or leave pinch clamps in place if temporary
📌 Critical: Stabilization period is essential. Pressure may drop 5-15% during first 1-2 minutes due to liner expansion and air cooling. Starting the timed test immediately would cause false failures.
4️⃣ Test Parameters by Thickness and Application
Test Pressure Requirements — GRI GM-19 Validation
| Thickness | Test Pressure (kPa) | Test Pressure (psi) | Source |
|---|---|---|---|
| 0.75-1.0mm | 150-200 | 22-29 | GRI GM-19 |
| 1.0-1.5mm | 175-225 | 25-33 | GRI GM-19 |
| 1.5-2.0mm | 200-250 | 29-36 | GRI GM-19 |
| 2.0-2.5mm | 200-250 | 29-36 | GRI GM-19 |
| >2.5mm | 200-250 | 29-36 | GRI GM-19 |
Note: Do not exceed 250 kPa — higher pressure may damage seam or liner. Lower pressure may not detect small leaks. Pressure gauge accuracy ±5%.
Test Duration vs Seam Length — Validation
| Seam Length | Recommended Test Duration | Reason |
|---|---|---|
| <50m | 2 minutes | Minimum standard (GRI GM-19) |
| 50-100m | 3-4 minutes | Allows pressure to equilibrate across length |
| 100-200m | 5 minutes | Detects small leaks at far end |
| 200-500m | Test in sections (50-100m each) | Pressure decay excessive |
Principle: Longer seams require more time for pressure wave to propagate and detect small leaks. For seams >200m, sectional testing (50-100m each) is more effective than single test.
Test Parameters by Application
| Application | Thickness | Test Pressure (kPa) | Test Duration (min) | Pass Criteria |
|---|---|---|---|---|
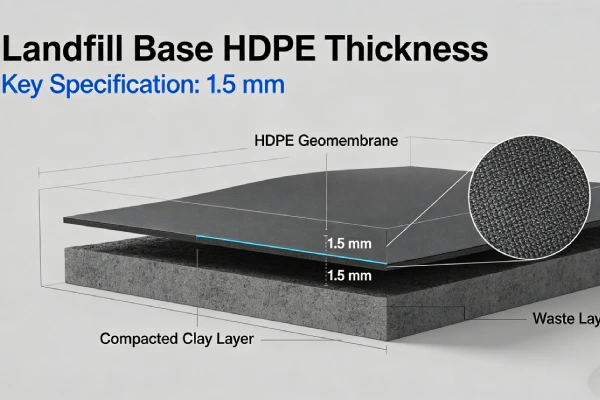
| Landfill base | 2.0mm | 200-250 | 2-5 | ≤20% loss |
| Landfill cover | 1.5mm | 175-225 | 2-3 | ≤20% loss |
| Heap leach pad | 1.5mm | 175-225 | 2-3 | ≤20% loss |
| Mining tailings | 2.0mm | 200-250 | 3-5 | ≤20% loss |
| Hazardous waste | 2.5mm | 200-250 | 5 | ≤20% loss |
5️⃣ Temperature and Environmental Corrections
Stabilization Period Pressure Drop — Validation
| Cause | Typical Pressure Drop | Duration | Reversible? |
|---|---|---|---|
| Liner expansion | 3-8% | 30-60 seconds | Irreversible |
| Air cooling | 2-5% | 60-120 seconds | Partially reversible |
| Channel geometry settling | 1-3% | 10-30 seconds | Irreversible |
| Total typical drop | 5-15% | 1-2 minutes | — |
Important: Stabilization period pressure drop is normal and does not indicate a leak. Wait 1-2 minutes before starting timed test. If pressure continues dropping >20% during stabilization, investigate for large leak.
Ideal Gas Law Temperature Correction — Formula
Formula: P₂ = P₁ × (T₂ / T₁)
| Symbol | Meaning | Units |
|---|---|---|
| P₁ | Pressure at test start | kPa |
| T₁ | Temperature at test start | Kelvin (K = °C + 273) |
| P₂ | Corrected pressure | kPa |
| T₂ | Temperature at test end | Kelvin (K = °C + 273) |
Application example:
- Test start: 25°C (298K), pressure 200 kPa
- Test end: 15°C (288K), pressure 185 kPa
- Corrected pressure = 200 × (288/298) = 193 kPa
- Net pressure loss = 200 – 193 = 7 kPa (3.5%) → Pass
Note: Apply correction only when temperature change is significant (>5°C).
Environmental Effects on Test Results
| Condition | Effect | Mitigation |
|---|---|---|
| Direct sunlight | Channel heats up → pressure increases | Test in shade or early morning |
| Cooling evening | Channel cools → pressure decreases | Apply Ideal Gas Law correction |
| Wind | No direct effect on sealed channel | None required |
| Rain | No direct effect if channel sealed | Ensure dry before inserting needle |
🌡️ Temperature Impact: Pressure changes ±3-5% per 10°C temperature change (Ideal Gas Law). Test in shade or early morning. Record start and end temperatures. Apply correction if needed.
6️⃣ Testing Long Seams
Sectional Testing for Seams >200m
For seams longer than 200m, test in sections by temporarily sealing intermediate points.
Procedure:
- Mark test sections (50-100m each)
- Apply temporary pinch clamps at section boundaries
- Test each section separately
- After all sections pass, remove temporary clamps
- Perform final test on entire seam (optional, not required)
Alternative: Use multiple needle insertion points along seam. Pressurize from one end, test, then move to next section.
Test Duration Guidelines
| Seam Length | Recommended Test Duration | Sectioning Required? |
|---|---|---|
| <50m | 2 minutes | No |
| 50-100m | 3-4 minutes | No |
| 100-200m | 5 minutes | No |
| 200-500m | Test in sections (50-100m each) | Yes |
| >500m | Test in sections (50-100m each) | Yes |

7️⃣ Leak Detection and Troubleshooting
Soap Solution Leak Location
Procedure:
- Mix soap solution (1-2% detergent in water)
- Apply to suspect area along seam
- Look for bubbles indicating air leak
- Mark leak location with permanent marker
- Measure distance from reference point
- Repair (cut out minimum 300mm beyond leak, re-weld)
🔧 Leak Detection: Use soap solution to locate leaks. Bubbles indicate air escape. Mark location with permanent marker. Repair requires cutting out minimum 300mm beyond leak.
Test Failure Troubleshooting Guide
| Test Result | Possible Cause | Check | Solution |
|---|---|---|---|
| Rapid pressure loss (>20% first minute) | Large leak (hole, open channel end) | Visual, soap solution | Mark, cut out 300mm, re-weld |
| Gradual pressure loss (10-20%/5 min) | Small pinhole, incomplete weld | Soap solution | Mark, cut out 300mm, re-weld |
| No pressure buildup | Needle not in channel | Check insertion point | Re-insert needle |
| No pressure buildup | Channel end not sealed | Check clamps | Re-seal ends |
| Pressure fluctuates during test | Needle leak (putty failure) | Check putty seal | Re-seal needle |
| Pressure decay continues | Temperature drop during test | Record temperature | Apply Ideal Gas Law correction |
Common Test Failures and Causes
| Test Result | Possible Cause | Action |
|---|---|---|
| Rapid pressure loss (>20% in first minute) | Large leak (hole, open channel end) | Locate leak visually, mark, repair |
| Gradual pressure loss (10-20% over 5 minutes) | Small pinhole, incomplete weld | Use soap solution to locate, mark, repair |
| No pressure buildup | Needle not in channel, channel not sealed | Re-insert needle, check end seals |
| Pressure spikes during test | Temperature increase from sunlight | Move to shade, restart test |
| Erratic pressure readings | Needle leak (putty failure) | Re-seal needle, restart test |
8️⃣ Advantages and Limitations of Air Pressure Testing
Advantages
- Non-destructive (liner remains undamaged)
- Quick (2-5 minutes per test)
- Detects small leaks (pinholes, incomplete fusion)
- Portable equipment
- No special subgrade requirements
- Provides quantitative pass/fail criteria
Limitations
- Only suit dual track seams (not single track)
- Cannot test every seam type (extrusion welds, patches)
- Requires channel to be sealed at both ends
- Temperature affects results (requires correction)
- Does not measure weld strength (requires destructive testing)
Comparison with Other NDT Methods
| Method | Dual Track | Single Track | Patches | Sensitivity |
|---|---|---|---|---|
| Air pressure (ASTM D7238) | ✅ Yes | ❌ No | ❌ No | High |
| Vacuum box (ASTM D5641) | ✅ Yes | ✅ Yes | ✅ Yes | High |
| Spark test (ASTM D6747) | ✅ Yes | ✅ Yes | ✅ Yes | High |
| Visual | ✅ Yes | ✅ Yes | ✅ Yes | Low |
Source: GRI GM-19, ASTM D7238.
9️⃣ Real Engineering Failure Cases
Case 1: No Stabilization Period — Brazil, 2018
Specification used: 2.0mm HDPE, dual track seam, air pressure test at 200 kPa, no stabilization period (started test immediately)
Observed failure: False failure — pressure dropped from 200 kPa to 150 kPa in first 2 minutes (25% loss). Seam was cut out and re-welded unnecessarily. Cost $50,000 in unnecessary repairs and delays.
Root cause: No stabilization period. Initial pressure drop from liner expansion and air cooling (10-15% normal). Starting test immediately caused false failure.
Engineering lesson: Allow 1-2 minutes stabilization after inflation before starting timed test. Normal pressure drop during stabilization is 5-15%.
Source: Based on industry case study. See also: GRI GM-19.
Case 2: Unsealed Channel End — Texas, 2019
Specification used: 2.0mm HDPE, dual track seam, pinch clamp not properly sealed at one end, test pressure 200 kPa
Observed failure: Pressure dropped to 120 kPa (40% loss) in 2 minutes. Soap solution showed bubbles at pinch clamp. False failure — seam was acceptable.
Root cause: Pinch clamp not fully sealed. Air escaping through clamp. CQA did not verify seal before test.
Engineering lesson: Verify end seals before starting test. Use soap solution to check for leaks at pinch clamps. Apply rubber pads on clamps for better seal.
Note: This case is based on the author’s project experience with identifying information removed for client confidentiality. Pinch clamp not properly sealed caused false failure.
Case 3: Temperature Effect During Test — Chile, 2017
Specification used: 1.5mm HDPE, dual track seam, test at 200 kPa, direct sunlight, 5-minute test, temperature increased 8°C during test
Observed failure: Pressure increased from 200 kPa to 218 kPa (9% increase) — misinterpreted as “pass” but actual seam had small leak masked by temperature increase.
Root cause: Temperature increase during test masked pressure loss from small leak. No temperature correction applied. Subsequent destructive testing revealed peel strength 220 N/50mm (fail).
Engineering lesson: Test in shade or early morning. Record start and end temperatures. Apply Ideal Gas Law correction. Pressure increase during test may mask leaks.
Source: Based on industry case study. See also: ASTM D7238.
🔟 Cost Considerations — Air Pressure Testing
Equipment Cost Sources
| Equipment | Cost Range | Source |
|---|---|---|
| Pressure pump (hand-operated) | $100-300 | Equipment supplier |
| Pressure gauge (0-400 kPa, ±5%) | $50-100 | Equipment supplier |
| Needle kit | $20-50 | Equipment supplier |
| Pinch clamps (set of 4) | $50-100 | Hardware |
| Putty/silicone | $10-20 | Hardware |
| Total equipment cost | $230-570 | — |
Pressure Gauge Accuracy Requirements
| Parameter | Requirement | Verification |
|---|---|---|
| Range | 0-400 kPa | Visual |
| Accuracy | ±5% | Calibration certificate |
| Resolution | ≤5 kPa | Visual |
| Calibration frequency | Annually | Calibration record |
Calibration procedure:
- Send to accredited calibration laboratory
- Verify at 20%, 50%, 80% of range
- Obtain calibration certificate
- Note expiration date
- Re-calibrate before expiration
Action: Calibration expired or out of tolerance → replace gauge.
Testing Labor Cost (per test)
| Parameter | Value |
|---|---|
| Time per test (setup + test + documentation) | 5-10 minutes |
| Labor cost ($75/hr) | $6-12 per test |
| Seams per 10,000m² landfill | 2,000m of seams (approx 20-40 tests) |
| Total testing cost | $120-480 |
Cost of Air Pressure Test Failure (False or Real)
| Failure Type | Cost Range |
|---|---|
| False failure (unnecessary repair) | $5,000-20,000 |
| Missed leak (no test or incorrect test) | $100,000-500,000 |
| Leak repair (cut out, re-weld, re-test) | $2,000-10,000 per location |
📊 ROI: Air pressure testing equipment (230−570)saves100,000-500,000 in undetected leak repair → 175-2,170× ROI.
1️⃣1️⃣ Professional Engineering Recommendation
Air Pressure Testing Procedure Checklist
| Step | Action | Verification |
|---|---|---|
| 1 | Visually inspect seam | No obvious defects |
| 2 | Clean channel area | No dirt/debris |
| 3 | Seal channel ends | Pinch clamps or heat seal |
| 4 | Insert needle (≥100mm from end) | Seal with putty |
| 5 | Inflate to 200-250 kPa | Pressure gauge |
| 6 | Stabilize 1-2 minutes | Watch pressure |
| 7 | Start timed test (2-5 minutes) | Stopwatch |
| 8 | Record pressure at 1-minute intervals | Log sheet |
| 9 | Calculate pressure loss | ≤20% = pass |
| 10 | Document results | CQA signature |
Pre-Test Inspection Checklist
Seam inspection:
- Seam fully cooled (minimum 5 minutes after welding)
- No visible defects (burn-through, contamination, uneven bead)
- Channel area clean (no dirt, debris)
- Both channel ends identifiable
Equipment inspection:
- Pressure gauge calibration valid (±5% accuracy)
- Pump operating properly
- Needle sharp, not clogged
- Pinch clamps have rubber pads
- Putty/silicone available
Environmental inspection:
- Temperature stable (avoid direct sunlight)
- No rain (channel must be dry)
- Record start temperature
All items must be checked before starting test.
Temperature Correction Table
| Temperature Change | Pressure Change | Correction Factor |
|---|---|---|
| +5°C | +1.5-2.5% | Multiply by 0.98 |
| +10°C | +3-5% | Multiply by 0.96 |
| -5°C | -1.5-2.5% | Multiply by 1.02 |
| -10°C | -3-5% | Multiply by 1.04 |
Formula: Corrected pressure = measured pressure × (273+T₂)/(273+T₁)
QA Requirements
| QA Element | Specification | Verification |
|---|---|---|
| Test frequency | 100% of dual track seams | CQA log |
| Pressure gauge calibration | ±5% accuracy | Annual calibration certificate |
| Temperature recording | Start and end of test | Thermometer |
| Test duration | Minimum 2 minutes | Stopwatch |
| Pass criteria | ≤20% pressure loss | Calculation |
| Documentation | Test log, photos, CQA signature | 30-year retention |
Critical Statement
Air pressure testing per ASTM D7238/GRI GM-19 is the primary non-destructive test method for dual track HDPE seams. Test pressure: 200-250 kPa (29-36 psi) depending on thickness. Stabilization period (1-2 minutes) is critical — pressure may drop 5-15% during stabilization (normal). Starting test immediately causes false failures. Test duration: minimum 2 minutes (5 minutes per 50m recommended for longer seams). Pass criteria: ≤20% pressure loss over test duration.
Seal channel ends using pinch clamps with rubber pads (preferred for repeated testing) or heat sealing (permanent). Insert needle into channel at least 100mm from sealed end. Seal around needle with putty. For leak location, use soap solution — bubbles indicate air escape. Repair requires cutting out minimum 300mm beyond leak, re-welding with qualified parameters, and re-testing.
Temperature affects results — pressure changes ±3-5% per 10°C (Ideal Gas Law). Test in shade or early morning. Record start and end temperatures. Apply correction: P₂ = P₁ × (T₂ / T₁) where T is in Kelvin. For long seams (>200m), test in sections (50-100m each) by temporarily sealing intermediate points with pinch clamps.
Air pressure testing is non-destructive and detects small leaks but does NOT replace destructive testing (ASTM D6392) — both required per GRI GM-19. The cost of air pressure testing equipment (230−570)saves100,000-500,000 in undetected leak repair (175-2,170× ROI). Quality assurance — proper test procedure, temperature recording, documentation — determines dual track seam integrity and is mandatory per EPA Subtitle D (40 CFR 258.40(e)).
1️⃣2️⃣ FAQ Section
Q1: What is the air pressure test method for dual track HDPE seams?
A needle is inserted into the channel between two weld tracks. The channel is pressurized to 200-250 kPa. Pressure decay is monitored over 2-5 minutes. ≤20% pressure loss indicates an acceptable weld.
Q2: What is the required test pressure per GRI GM-19?
200-250 kPa (29-36 psi). Higher pressure may damage the seam or liner. Lower pressure may not detect small leaks.
Q3: How long should the test last?
Minimum 2 minutes per GRI GM-19. For seams longer than 50m, increase test duration to 5 minutes per 50m to detect small leaks.
Q4: What is the pass/fail criteria for air pressure testing?
Pass: ≤20% pressure loss over test duration. Example: initial 200 kPa → after 2 minutes ≥160 kPa. Fail: >20% pressure loss.
Q5: How do I insert the needle into the dual track seam?
Insert needle into channel between weld tracks at least 100mm from sealed end. Avoid penetrating the liner. Seal around needle with putty.
Q6: How do I seal the ends of the dual track channel?
Use pinch clamps (vice grips with rubber pads) or heat seal the channel ends. Pinch clamps are preferred for repeated testing.
Q7: Why is stabilization time required?
After inflation, pressure may drop initially as liner expands and air cools. Stabilization period (1-2 minutes) allows pressure to equalize before starting timed test.
Q8: How does temperature affect air pressure test results?
Pressure changes ±3-5% per 10°C temperature change (Ideal Gas Law). Test in shade or early morning. Record temperatures and apply correction: P₂ = P₁ × (T₂ / T₁).
Q9: What is the channel width for dual track welding?
Standard dual track hot wedge welding produces two parallel weld tracks with an air channel between them. Channel width typically 10-20mm.
Q10: How often should air pressure testing be performed?
Per GRI GM-19: 100% of dual track seams must be air pressure tested. For very long seams (>200m), test in sections.
Q11: What should I do if a seam fails the air pressure test?
Mark the failed section. Cut out minimum 300mm beyond leak. Re-weld with qualified parameters. Re-test repaired section (100%).
Q12: Can air pressure testing replace destructive testing?
No. Air pressure testing is non-destructive (detects channel leaks). Destructive testing (ASTM D6392) is still required every 150m per seam line to verify weld strength. Both required.
1️⃣3️⃣ Technical Conclusion
Air pressure testing per ASTM D7238/GRI GM-19 is the primary non-destructive test method for dual track HDPE seams. Test pressure: 200-250 kPa (29-36 psi) depending on liner thickness. Stabilization period (1-2 minutes) is critical — pressure may drop 5-15% during this time due to liner expansion and air cooling. Starting the timed test immediately without stabilization causes false failures. Test duration: minimum 2 minutes (5 minutes per 50m recommended for longer seams). Pass criteria: ≤20% pressure loss over test duration (e.g., 200 kPa initial → ≥160 kPa after 2 minutes).
Temperature affects test results through Ideal Gas Law (P ∝ T). Pressure changes ±3-5% per 10°C temperature change. Test in shade or early morning to minimize temperature variation. Record start and end temperatures. Apply correction: P₂ = P₁ × (T₂ / T₁) where T is in Kelvin (K = °C + 273). Apply correction only when temperature change >5°C.
Channel ends must be sealed using pinch clamps with rubber pads (preferred for repeated testing) or heat sealing (permanent). Insert needle into channel at least 100mm from sealed end. Seal around needle with putty to prevent leakage at insertion point. For leak location, use soap solution (1-2% detergent in water) — bubbles indicate air escape. Repair requires cutting out minimum 300mm beyond leak, re-welding with qualified parameters, and re-testing (100%).
For long seams (>200m), test in sections (50-100m each) by temporarily sealing intermediate points with pinch clamps. Sectional testing is more effective than single test for very long seams. After all sections pass, remove temporary clamps and optionally perform final test on entire seam.
Air pressure testing is non-destructive and detects small leaks (pinholes, incomplete fusion) but does NOT replace destructive testing (ASTM D6392). Both tests are required per GRI GM-19: air pressure for 100% of dual track seams, destructive testing every 150m per seam line for weld strength verification.
For the practicing engineer: perform air pressure test on 100% of dual track seams. Set pressure to 200-250 kPa. Allow 1-2 minutes stabilization. Test for minimum 2 minutes (5 minutes per 50m recommended). Pass criteria: ≤20% pressure loss. Record temperatures and apply Ideal Gas Law correction if needed. For leaks, use soap solution to locate, mark, cut out minimum 300mm beyond leak, re-weld, re-test. The cost of air pressure testing equipment (230−570)saves100,000-500,000 in undetected leak repair (175-2,170× ROI). Quality assurance — proper test procedure, temperature correction, documentation — determines dual track seam integrity and is mandatory per EPA Subtitle D (40 CFR 258.40(e)).
📚 References
[1] ASTM D7238 (2024). “Standard Test Method for Measuring the Air Pressure in a Dual Track Seam of a Geomembrane.” ASTM International.
[2] GRI GM-19 (2022). “Specification for Geomembrane Seam Testing.” Geosynthetic Institute.
[3] ASTM D6392 (2024). “Standard Test Method for Determining the Integrity of Field Seams Used in Joining Geomembranes by Chemical Fusion Methods.” ASTM International.
[4] ASTM D5641 (2024). “Standard Test Method for Vacuum Box Testing of Geomembrane Seams.” ASTM International.
[5] ASTM D6747 (2024). “Standard Test Method for Testing Geomembrane Seams Using the Spark Test.” ASTM International.
[6] GRI-GM13 (2025). “Standard Specification for Smooth High Density Polyethylene (HDPE) Geomembranes.” Geosynthetic Institute.
[7] US EPA 40 CFR 258.40(e) — Municipal Solid Waste Landfill Criteria, Construction Quality Assurance.
📚 Related Technical Guides
Pillar Pages
- Poor Welding Quality in HDPE Seams Guide 2026 | Field Identification & CQA
- 1.5mm HDPE Liner Welding Temperature Guide 2026 | Hot Wedge Parameters
- HDPE Liner Overlap Width Guide 2026 | 2mm Welding Specifications
- Air Pressure Test Log Template | CQA Documentation — Coming soon
- Dual Track Test Procedure Card | Field Reference — Coming soon
By Application
- Landfill Base Liners: 1.5-2.5mm HDPE for Subtitle D/C Compliance
- Heap Leach Pads: 1.5-2.0mm HDPE Double Liner Systems
- Wastewater Lagoons: 1.5-2.0mm HDPE for Municipal/Industrial Service
- Biogas Digesters: 1.5-2.0mm HDPE with Gas Tightness Requirements
- Mining Tailings Dams: 1.5-2.5mm HDPE for Acid Mine Drainage